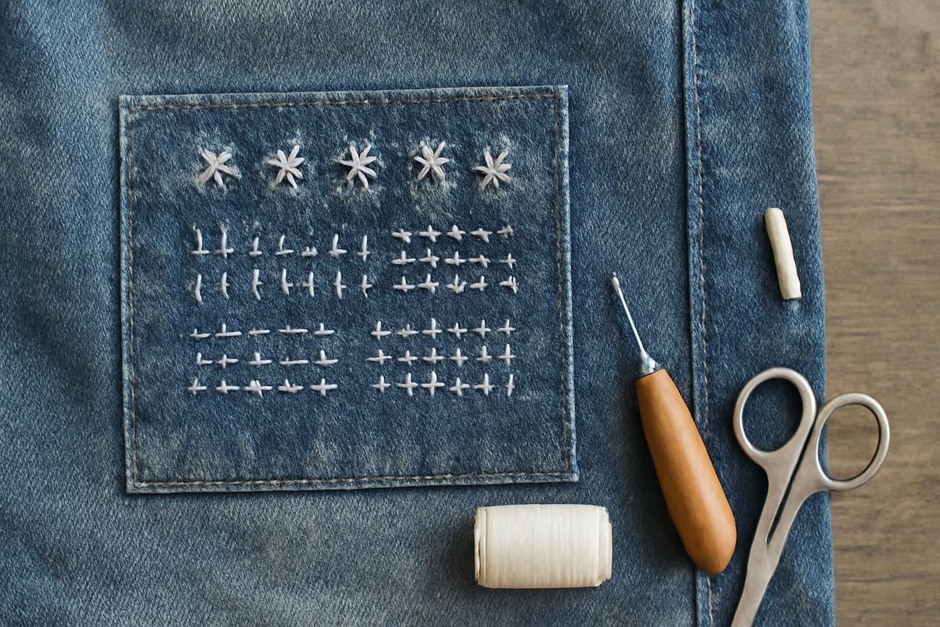
A Small Mending Sampler: A Quiet Method for Visible Mending
Before clothing became so inexpensive and disposable, households kept a stock of needles, thread, and small scraps of cloth to extend the life of garments. Across cultures that craft knowledge took different shapes: Japanese sashiko reinforced indigo workwear with running stitches, European households used darning eggs and simple weaving to close holes in socks, and quilted scraps were reborn as patches. Today visible mending is both a practical repair and a small, quiet craft—an opportunity to make a place where something has worn into something made anew.
Why a small sampler?
A sampler lets you practice a handful of stitches on a forgiving scrap before committing to a beloved shirt or a pair of trousers. It also becomes a patchwork vocabulary: a running stitch to hold a frayed edge, a woven darning to fill a hole, and a decorative sashiko grid to reinforce a stressed seam. The method below focuses on modest tools and calm repetition—suitable for a short evening project and repeatable when you notice the next thin spot.
Step-by-step method: a small visible-mending sampler
- Gather tools and materials.
- Needles: one medium sharps needle and one embroidery needle (blunt needle for knits).
- Thread: strong cotton or polyester thread for utility, and a thicker embroidery thread (perle or sashiko) for visible stitches.
- Scrap fabric: a square about 6–8 inches of similar-weight fabric to the garment, or a contrasting scrap for visibility.
- Scissors, pins, and an embroidery hoop or darning mushroom (optional).
- Prepare the sampler.
Lay the sample fabric flat and, if needed, press a small square of lightweight interfacing behind the area where you will work to provide stability. Mark a grid lightly with a removable fabric marker—three or four vertical and horizontal lines spaced about 1 cm apart will guide your stitches.
- Set the running-stitch border.
Using a single strand of embroidery thread, sew a neat running-stitch border around the outer edge of the grid. This reinforces the working area and practices even stitch length.
- Try a woven darning patch.
Along a 1½-inch (4 cm) long thin area, anchor threads across the hole: sew parallel long running stitches east–west to make warp-like bars. Then weave the needle over and under these bars to create a woven fill. Keep tension even; the goal is a fabric-like fill that moves with the garment.
- Practice a sashiko-style grid.
With thicker thread and an embroidery needle, stitch evenly spaced running stitches along the drawn grid lines, making visible dashed lines that both reinforce and decorate. Simple geometric motifs—squares, diamonds, or arrowheads—work well for stress-prone areas.
- Make a small patch and secure edges.
Cut a patch slightly larger than the repaired area. Pin it over the woven darning and sew close-running stitches around the patch edge, then couch the patch down with small decorative stitches across the surface so it reads as an intentional detail rather than a hidden fix.
- Finish and trim.
Tidy thread ends on the underside, trim any excess fabric, and press the piece gently. Test flexibility and re-stitch any areas that feel loose.
How this connects to history
The method mixes techniques that are centuries old. The woven fill is kin to sock-darning traditions; the sashiko grid echoes the Japanese practice of visible reinforcement that became decorative; and patching with couching stitches reflects rural European approaches where broken textiles were turned into visible heritage. Practicing them in a small sampler links you to those modest, skillful economies of repair.
Variations
- Denim and heavy cotton: Use thicker thread, a sturdy needle, and larger, visible sashiko stitches. Patches of contrasting indigo make a classic look.
- Knits and sweaters: Work with a blunt tapestry needle and use a darning mushroom to mimic the fabric curve. Use a match-weight yarn and knit-like weaving to bridge holes.
- Decorative-only: Skip the woven fill and create motifs—stars, waves, or initials—across thin spots to transform wear into pattern.
- Colorful samplers: Combine threads of different values—lighter threads on dark fabric or vice versa—to make the repair a visible design element.
Troubleshooting
- Puckering: If the patch pulls the surrounding fabric, loosen your tension or use a lighter-weight patch and longer stitches. An interfacing support can prevent distortion when working on thin fabric.
- Thread breaks: Use a stronger thread or double the thread for heavy wear areas. Choose a needle eye that fits the thread without crushing it.
- Hole too large: Layer a backing scrap behind the area and tack it in place before weaving. Consider a larger applied patch with couching stitches to distribute stress.
- Fragile edges: Reinforce frayed edges with close overcasting stitches before filling so the surrounding fabric won’t continue to tear.
- Uneven stitches: Mark guides with washable chalk or tailor’s tacks, and practice regularly on the sampler—consistency comes from steady repetition, not speed.
This small routine—oning a square of fabric, choosing a thread, and repeating a handful of stitches—turns mending into a calm, domestic craft. The sampler is both training ground and decorative patch: a way to preserve a garment and to hold a small story of use and care where it matters most.